How To Clean Hydrogen Water Bottle? [Newest Updated]
Hydrogen water bottles are innovative devices designed to infuse water with hydrogen, offering potential health benefits through increased antioxidant properties. These bottles require regular maintenance to ensure they function correctly and provide clean, pure water.
![How To Clean Hydrogen Water Bottle? [Newest Updated]](https://besthydrogenwatermachine.com/wp-content/uploads/2024/08/How-To-Clean-Hydrogen-Water-Bottle-Newest-Updated.png)
In this post, we will guide you step by step on how to clean your hydrogen water bottle effectively. We will explore various cleaning methods, recommend the best cleaning frequency, and highlight common mistakes to avoid. By the end, you’ll have all the information you need to keep your hydrogen water bottle in top condition.
If you’re short on time, we’ve assembled a very fast and easy guide just for you:
Step 1: Disassemble the Bottle
Step 2: Rinse with Warm Water
Step 3: Apply a Cleaning Solution
Step 4: Scrub Gently
Step 5: Clean the Hydrogen Generator
Step 6: Rinse Thoroughly
Step 7: Dry Completely
Materials and Tools You’ll Need
Essential Cleaning Supplies
- Soft Brush:
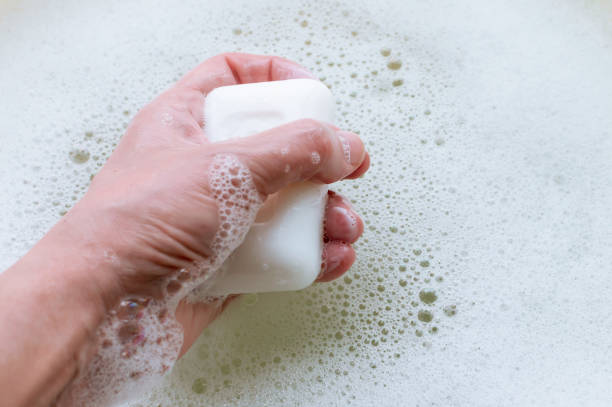
A soft-bristle brush is indispensable for scrubbing both the interior and exterior of your hydrogen water bottle without causing scratches. This tool helps remove residue and stains that can build up over time. Opt for brushes with flexible handles to reach all parts of the bottle, especially narrow openings. - Mild Soap:
Use a mild, non-toxic soap to clean your bottle. Avoid harsh detergents as they may damage sensitive components like the hydrogen generator or the bottle’s finish. Mild soap is gentle yet effective, making it ideal for daily cleaning. - Vinegar:
Vinegar is a natural disinfectant known for its ability to remove odors and kill bacteria. It’s handy for glass and stainless steel bottles. Mix vinegar with warm water for a safe and eco-friendly cleaning solution. However, be sure to rinse thoroughly to prevent any lingering smell. - Hydrogen Peroxide:
Hydrogen peroxide offers a deep clean and is excellent for sanitizing your bottle. It’s especially effective against stubborn bacteria and can be used for occasional deep cleaning. However, exercise caution with plastic bottles, as hydrogen peroxide can degrade certain materials over time. - Cleaning Cloth or Sponge:
A microfiber cloth or soft sponge is necessary for wiping down the exterior and drying the bottle after cleaning. These materials are gentle on all surfaces and help prevent water spots and streaks, particularly on glass bottles.
Specific Tools for Different Bottle Materials
- Glass Bottles:
For glass bottles, use a soft brush and vinegar solution. Glass is durable, but it’s also prone to streaking, so a microfiber cloth is recommended for drying. Avoid using hydrogen peroxide frequently, as it can cause etching on the glass surface over time. - Stainless Steel Bottles:
Stainless steel bottles can handle more rigorous cleaning agents. A soft brush, mild soap, and vinegar are suitable for regular cleaning. For stubborn stains or deep cleaning, hydrogen peroxide can be used safely. Stainless steel is resistant to corrosion, making it a durable option. - Plastic Bottles:
Plastic bottles require gentle care to avoid scratches and degradation. Use a soft brush and mild soap for routine cleaning. Avoid using hydrogen peroxide frequently, as it can weaken the plastic over time. Instead, stick to vinegar or a mild soap solution for maintaining plastic bottles.
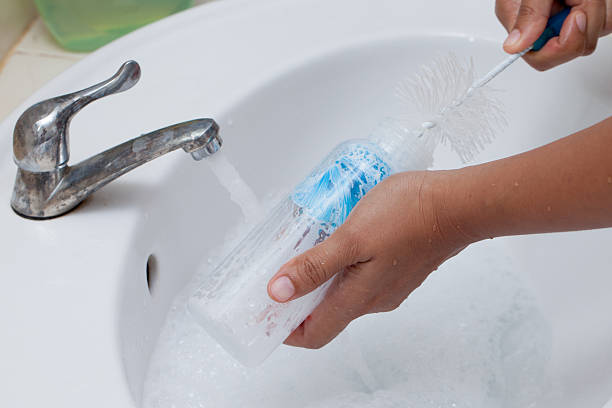
Step-by-Step Guide to Cleaning Your Hydrogen Water Bottle
Step 1: Disassemble the Bottle
First, remove all detachable parts from your hydrogen water bottle. Start with the lid, then carefully detach the hydrogen generator, if possible. Some bottles have additional components like filters or silicone seals—ensure these are also removed. Disassembling the bottle allows you to clean each part thoroughly, ensuring no residue is left behind.
Tip: Handle the hydrogen generator with care. This component is sensitive and should not come into contact with water or cleaning solutions directly.
Step 2: Rinse with Warm Water
Next, rinse each part of the bottle with warm water. This step helps to remove any loose debris, such as dust or residue from previous uses. Warm water is effective in loosening any particles clinging to the surface, making the cleaning process easier.
Important: Ensure that the water temperature is not too hot, as extreme heat may warp plastic components or damage the hydrogen generator.
Step 3: Apply a Cleaning Solution
After rinsing, apply a cleaning solution to the bottle’s interior and exterior surfaces. Use a mild soap or a solution made from vinegar for glass and stainless steel bottles. For plastic bottles, stick to mild soap to prevent degradation. Pour a small amount of the solution into the bottle, then use a soft brush or sponge to apply it evenly across all surfaces.
Safety Note: Avoid using abrasive cleaners or harsh chemicals that could damage the bottle’s materials or leave harmful residues.
Step 4: Scrub Gently
With the cleaning solution applied, gently scrub the inside and outside of the bottle. Use a soft-bristle brush to reach all corners, paying particular attention to any crevices where dirt may accumulate. Be gentle to avoid scratching or damaging the bottle, especially if it’s made from glass or plastic.
Pro Tip: Use a bottle brush with a long handle for better reach into narrow openings.
Step 5: Clean the Hydrogen Generator
Cleaning the hydrogen generator requires special care. Never submerge it in water or apply liquid directly to it. Instead, use a dry, soft cloth to wipe it down. If there is any build-up, lightly dampen the cloth with a small amount of the cleaning solution and gently wipe the surface.
Do’s and Don’ts: Do not use any abrasive materials or immerse the generator in water. Ensure it’s completely dry before reassembling.
Step 6: Rinse Thoroughly
Once scrubbing is complete, rinse each part of the bottle thoroughly with warm water. This step is crucial to remove all traces of the cleaning solution, which could otherwise affect the taste of the water or the functionality of the hydrogen generator. Ensure no residue is left behind, especially in small parts like seals or threads.
Reminder: Double-check that all cleaning agents are fully rinsed away, particularly from the interior surfaces.
Step 7: Dry Completely
The final step is to dry all components completely. Air drying is the safest method, as it prevents the retention of moisture that could lead to mold or bacteria growth. Place the parts on a clean, dry towel and allow them to air dry fully. Alternatively, you can use a soft towel to dry them manually, but ensure no moisture remains before reassembling.
Final Tip: Store the hydrogen generator and other sensitive parts separately if not immediately reassembling, to prevent any accidental exposure to moisture.
Different Methods and Their Pros and Cons
Method 1: Using Mild Soap and Water
Cleaning with mild soap and water is the most straightforward and commonly used method. It’s effective for regular maintenance and safe for all types of bottle materials.
Guidelines:
- Fill the bottle with warm water.
- Add a few drops of mild soap.
- Use a soft brush to scrub the inside of the bottle.
- Rinse thoroughly with warm water.
- Dry completely before reassembling.
Pros and Cons:
| 👍Pros | 👎Cons |
|
|
|
|
|
|
Tip: This method is ideal for daily cleaning to prevent build-up.
Method 2: Vinegar Solution
Vinegar is a natural disinfectant, making it a popular choice for cleaning. It’s particularly effective at eliminating odors and killing bacteria.

Guidelines:
- Mix equal parts of vinegar and water.
- Pour the solution into the bottle.
- Let it sit for 15-20 minutes.
- Scrub gently with a soft brush.
- Rinse thoroughly to remove any lingering vinegar smell.
Pros and Cons:
| 👍Pros | 👎Cons |
|
|
|
|
|
|
Reminder: Always rinse well to avoid the strong vinegar odor affecting the taste of the water.
Method 3: Baking Soda and Water
Baking soda is excellent for removing stains and neutralizing odors. It’s a safe and effective method for most materials.
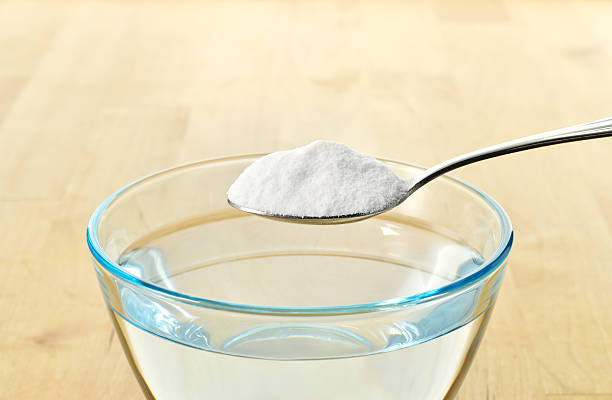
Guidelines:
- Mix one tablespoon of baking soda with water to form a paste.
- Apply the paste to the stained areas.
- Scrub gently with a soft brush.
- Rinse thoroughly with warm water.
- Dry completely before reassembling.
Pros and Cons:
| 👍Pros | 👎Cons |
|
|
|
|
|
|
Advice: Use this method occasionally for deep cleaning, especially when dealing with stubborn stains.
Method 4: Hydrogen Peroxide
Hydrogen peroxide is a powerful disinfectant, ideal for deep cleaning. However, it must be used with care, especially on delicate materials.
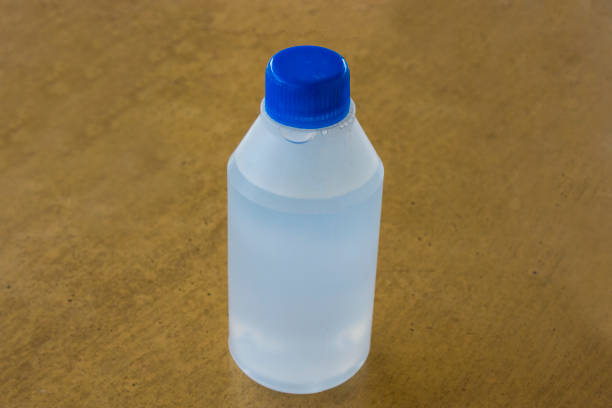
Guidelines:
- Dilute hydrogen peroxide with an equal amount of water.
- Pour the solution into the bottle.
- Let it sit for 10-15 minutes.
- Rinse thoroughly with warm water.
- Allow to dry completely before use.
Pros and Cons:
| 👍Pros | 👎Cons |
|
|
|
|
|
|
Warning: Use hydrogen peroxide sparingly to avoid damaging sensitive components, such as the hydrogen generator or plastic parts.
Method 5: Dishwasher Cleaning
For those who prefer convenience, using a dishwasher can be an effective method for cleaning hydrogen water bottles. However, this method is not suitable for all types of bottles.
Guidelines:
- Disassemble the bottle, removing the hydrogen generator and any sensitive parts.
- Place the bottle components on the top rack of the dishwasher.
- Use a gentle cycle with mild detergent.
- Allow the parts to air dry completely after washing.
Pros and Cons:
| 👍Pros | 👎Cons |
|
|
|
|
|
|
Caution: Always check the manufacturer’s instructions to ensure your bottle is dishwasher-safe before using this method.
How Often Should You Clean Your Hydrogen Water Bottle?
Regular cleaning of your hydrogen water bottle is essential to maintain its hygiene, functionality, and the quality of the water it produces. The frequency of cleaning depends on how often you use the bottle and the type of water you fill it with. Below are clear guidelines to help you establish an effective cleaning routine.
Daily Cleaning
If you use your hydrogen water bottle every day, a daily cleaning routine is recommended. This quick clean helps to prevent the build-up of bacteria and ensures that your water stays fresh.
Guidelines:
- Rinse the bottle with warm water after each use. This removes any remaining water and loose debris.
- Use mild soap to wash the bottle, focusing on areas that come into contact with your mouth and water.
- Rinse thoroughly to remove all soap residue.
- Dry completely by air drying or using a clean towel.
Considerations: Daily cleaning is especially important if you use tap water or leave the bottle in warm environments, as both can increase bacterial growth.
Weekly Cleaning
For most users, a weekly deep clean is essential, even if you clean your bottle daily. This involves more thorough methods to remove stains, odors, and any bacteria that might have developed over time.
Guidelines:
- Disassemble the bottle completely, removing all detachable parts.
- Soak the components in a mixture of vinegar and water or use a baking soda solution for tougher stains.
- Scrub gently using a soft brush to reach all areas, including crevices.
- Rinse thoroughly to ensure no cleaning agent remains.
- Dry completely before reassembling.
Considerations: Weekly cleaning is critical if you use mineral-rich or hard water, as it can leave residues that affect the performance of the hydrogen generator.
Monthly Cleaning
A monthly cleaning routine focuses on deep sanitization to ensure long-term safety and performance. This is the time to use stronger disinfectants and ensure that every part of the bottle is thoroughly cleaned.
Guidelines:
- Use hydrogen peroxide diluted with water for a powerful sanitizing clean.
- Soak all components for at least 10 minutes to kill any bacteria or mold.
- Scrub all parts to remove any stubborn build-up.
- Rinse thoroughly to eliminate any traces of hydrogen peroxide.
- Dry completely before reassembling.
Considerations: Monthly cleaning is crucial if your bottle has been exposed to outdoor elements or if you notice any discoloration or persistent odors.
Common Mistakes to Avoid
Proper care of your hydrogen water bottle is essential to maintain its functionality and ensure the safety of the water you consume. However, there are common mistakes that many users make during cleaning, which can damage the bottle or reduce its effectiveness. Below are practical tips on avoiding these errors to keep your bottle in top condition.
- Avoid Using Harsh Chemicals
One of the most common mistakes is using harsh chemicals to clean the bottle. While it may seem effective, chemicals like bleach or abrasive cleaners can damage the bottle’s material and harm sensitive components, such as the hydrogen generator.
Tip: Stick to mild soap, vinegar, or baking soda as your primary cleaning agents. These are effective yet gentle on most materials. If you need a stronger disinfectant, use diluted hydrogen peroxide, but only occasionally and with care.
Reference: CDC: Safe Cleaning Practices
- Don’t Ignore the Hydrogen Generator
The hydrogen generator is the most crucial component of your water bottle, yet it’s often overlooked during cleaning. Failing to clean it or, worse, submerging it in water, can lead to malfunction or permanent damage.
Tip: Always disassemble the generator from the bottle before cleaning. Wipe it down with a dry cloth, and never immerse it in water or apply liquid directly. Ensure it is completely dry before reassembling the bottle.
Reference: EPA: Protecting Electronic Components During Cleaning
- Thorough Drying Is Essential
Another common mistake is not drying the bottle thoroughly after cleaning. Residual moisture can lead to mold growth or corrosion, particularly in stainless steel or plastic bottles.
Tip: After rinsing, allow the bottle and all its components to air dry completely. If you’re in a hurry, use a clean, dry towel to wipe down each part. Pay special attention to the threads and crevices, where moisture can easily accumulate.
Reference: FDA: Preventing Mold in Reusable Containers
- Avoid Scrubbing Too Hard
Scrubbing too vigorously, especially with abrasive tools, can scratch the interior surface of the bottle. Scratches can harbor bacteria and affect the taste of the water.
Tip: Use a soft-bristle brush or sponge to clean the bottle. Gentle circular motions are enough to remove most residues without damaging the surface. For tough stains, use baking soda or vinegar, which can lift dirt without the need for excessive scrubbing.
Reference: Healthline: Best Practices for Cleaning Bottles
- Don’t Use the Dishwasher If Not Recommended
Some hydrogen water bottles are not dishwasher-safe. Placing them in the dishwasher can lead to warping, damage to the hydrogen generator, or degradation of the materials.
Tip: Always check the manufacturer’s instructions before using the dishwasher. If in doubt, hand wash your bottle using the methods described earlier. This ensures that all parts are cleaned thoroughly without risk of damage.
Reference: FDA: Guidelines on Dishwasher Use for Reusable Bottles
Why It’s Important to Clean Your Hydrogen Water Bottle Regularly
Maintaining hygiene in your hydrogen water bottle is not just about keeping it looking clean; it’s crucial for ensuring the safety and quality of the water you drink. Regular cleaning prevents harmful bacteria growth, preserves the bottle’s functionality, and extends its lifespan. Here’s why regular cleaning is essential.
- The Significance of Maintaining Hygiene
Hydrogen water bottles, like any other reusable water containers, can become a breeding ground for bacteria if not cleaned regularly. Every time you use your bottle, bacteria from your mouth and the environment can enter, thriving in the moist conditions inside the bottle.
Practical Tip: Regular cleaning eliminates these bacteria, preventing potential health risks. Even if your bottle looks clean, invisible contaminants can accumulate, making thorough and frequent cleaning a non-negotiable task.
Reference: CDC: Importance of Hygiene in Reusable Water Bottles
- The Risks of Not Cleaning
Failing to clean your hydrogen water bottle can lead to several problems. The most immediate risk is bacteria growth, which can cause illness. Over time, unclean bottles can develop mold, affecting both the taste and safety of the water. Additionally, residues from previous uses can impact the quality of the hydrogen-infused water, reducing its effectiveness.
Key Points:
- Bacteria Growth: Without regular cleaning, bacteria such as E.coli and Staphylococcus can flourish inside the bottle, posing a significant health risk.
- Impact on Water Quality: Contaminants can alter the pH levels and purity of the water, diminishing the benefits of hydrogen-rich water.
- Long-term Damage: Accumulated dirt and residue can cause corrosion or other damage to the bottle’s materials, especially in the hydrogen generator, leading to reduced performance or even malfunction.
Reference: EPA: Risks of Not Cleaning Reusable Containers
- Benefits of Regular Cleaning
Regular cleaning does more than just protect your health; it also ensures that your hydrogen water bottle functions optimally for a longer period. By preventing the build-up of harmful substances, you help maintain the integrity of the bottle’s materials, particularly the sensitive hydrogen generator.
Benefits:
- Prolonged Lifespan: Clean bottles are less likely to suffer from material degradation, meaning your investment lasts longer.
- Consistent Water Quality: Regular cleaning ensures that each use delivers the pure, hydrogen-rich water that your bottle is designed to provide.
- Enhanced User Experience: A clean bottle is more pleasant to use, with no lingering odors or tastes from previous contents.
Practical Advice: Integrate a cleaning routine that matches your usage frequency. For daily users, a quick clean every day with a deep clean weekly or monthly is recommended.
Reference: FDA: Best Practices for Extending the Life of Reusable Bottles
Conclusion
Regular cleaning of your hydrogen water bottle is crucial for maintaining both its hygiene and functionality. By ensuring that your bottle is free from bacteria, residue, and other contaminants, you protect your health and preserve the quality of the hydrogen-rich water you consume. Consistent cleaning not only enhances the water’s purity but also extends the lifespan of your bottle, particularly the sensitive hydrogen generator.
You can visit our main website for the best hydrogen water machine bottles to explore expert reviews, top recommendations, and everything you need to make an informed choice. Keep your bottle in peak condition and enjoy pure, hydrogen-rich water every day.
FAQs
Can I use bleach to clean my hydrogen water bottle?
No, using bleach is not recommended as it can damage the materials and leave harmful residues.
What’s the best way to clean stubborn stains?
Use a mixture of baking soda and water, or a vinegar solution, and scrub gently with a soft brush.
How do I know if my hydrogen generator needs extra cleaning?
If the generator’s performance decreases or you notice a build-up, it’s time for a thorough cleaning.
Can I use my bottle right after cleaning?
Yes, but make sure all components are completely dry to avoid moisture build-up.